LanceIQ Docs
LanceIQ developer docs
Create an account, create a workspace, copy the workspace credentials, and then do the rest from your backend code using the SDK or API.
Dashboard Setup
Set up LanceIQ in 4 steps.
Follow these steps in order.
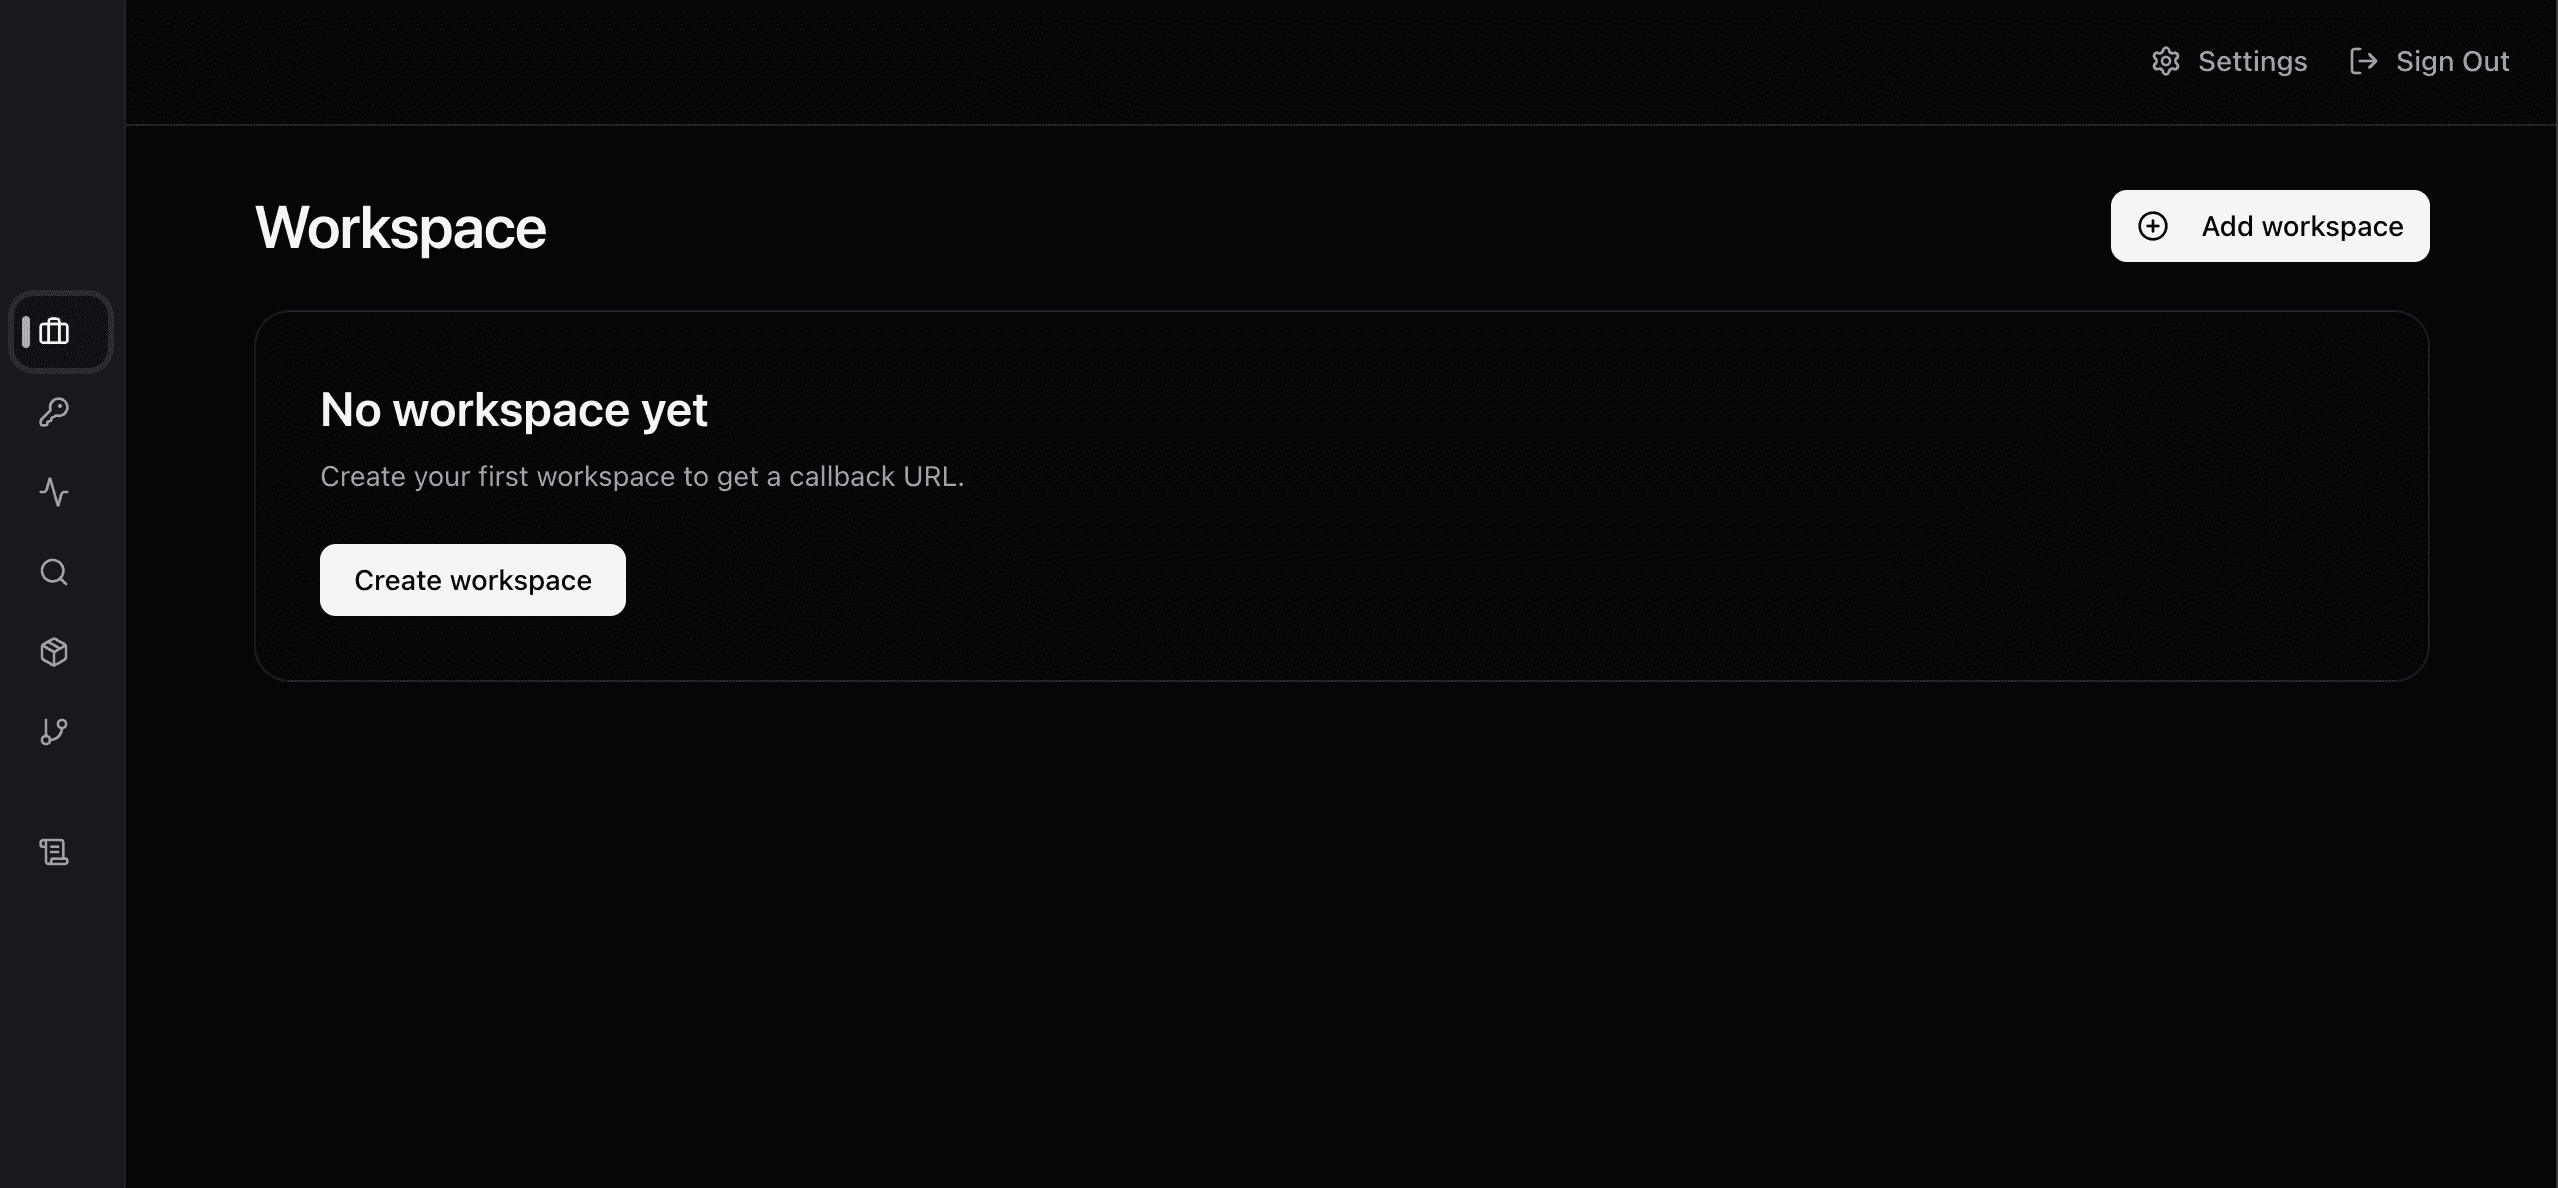
1. Click add workspace or create workspace button
Start here if this is your first time using LanceIQ.
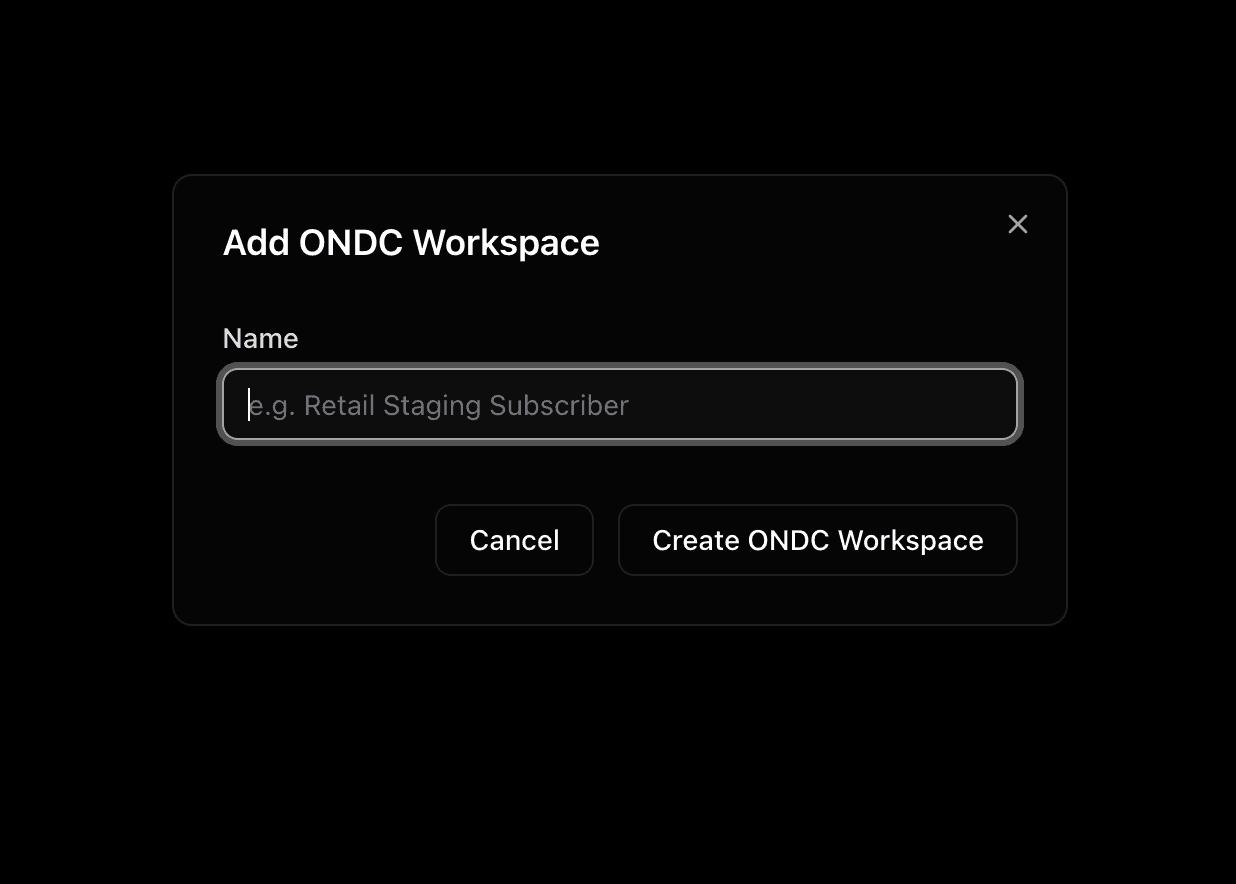
2. Fill the workspace details
Enter a workspace name and create it.
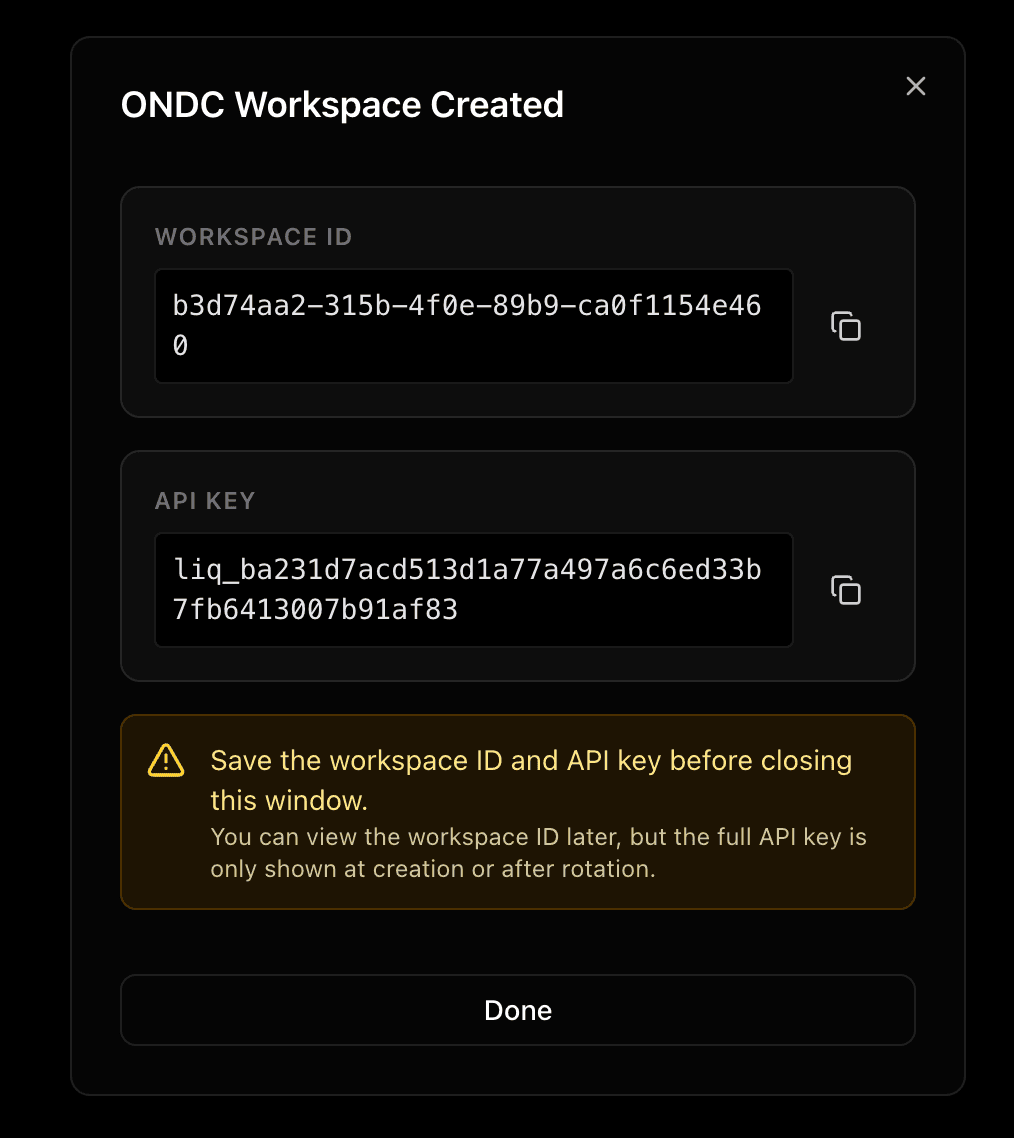
3. Copy the workspace ID and API key
Copy both values immediately. The workspace ID is safe to reference later, while the full API key should be treated like a secret.
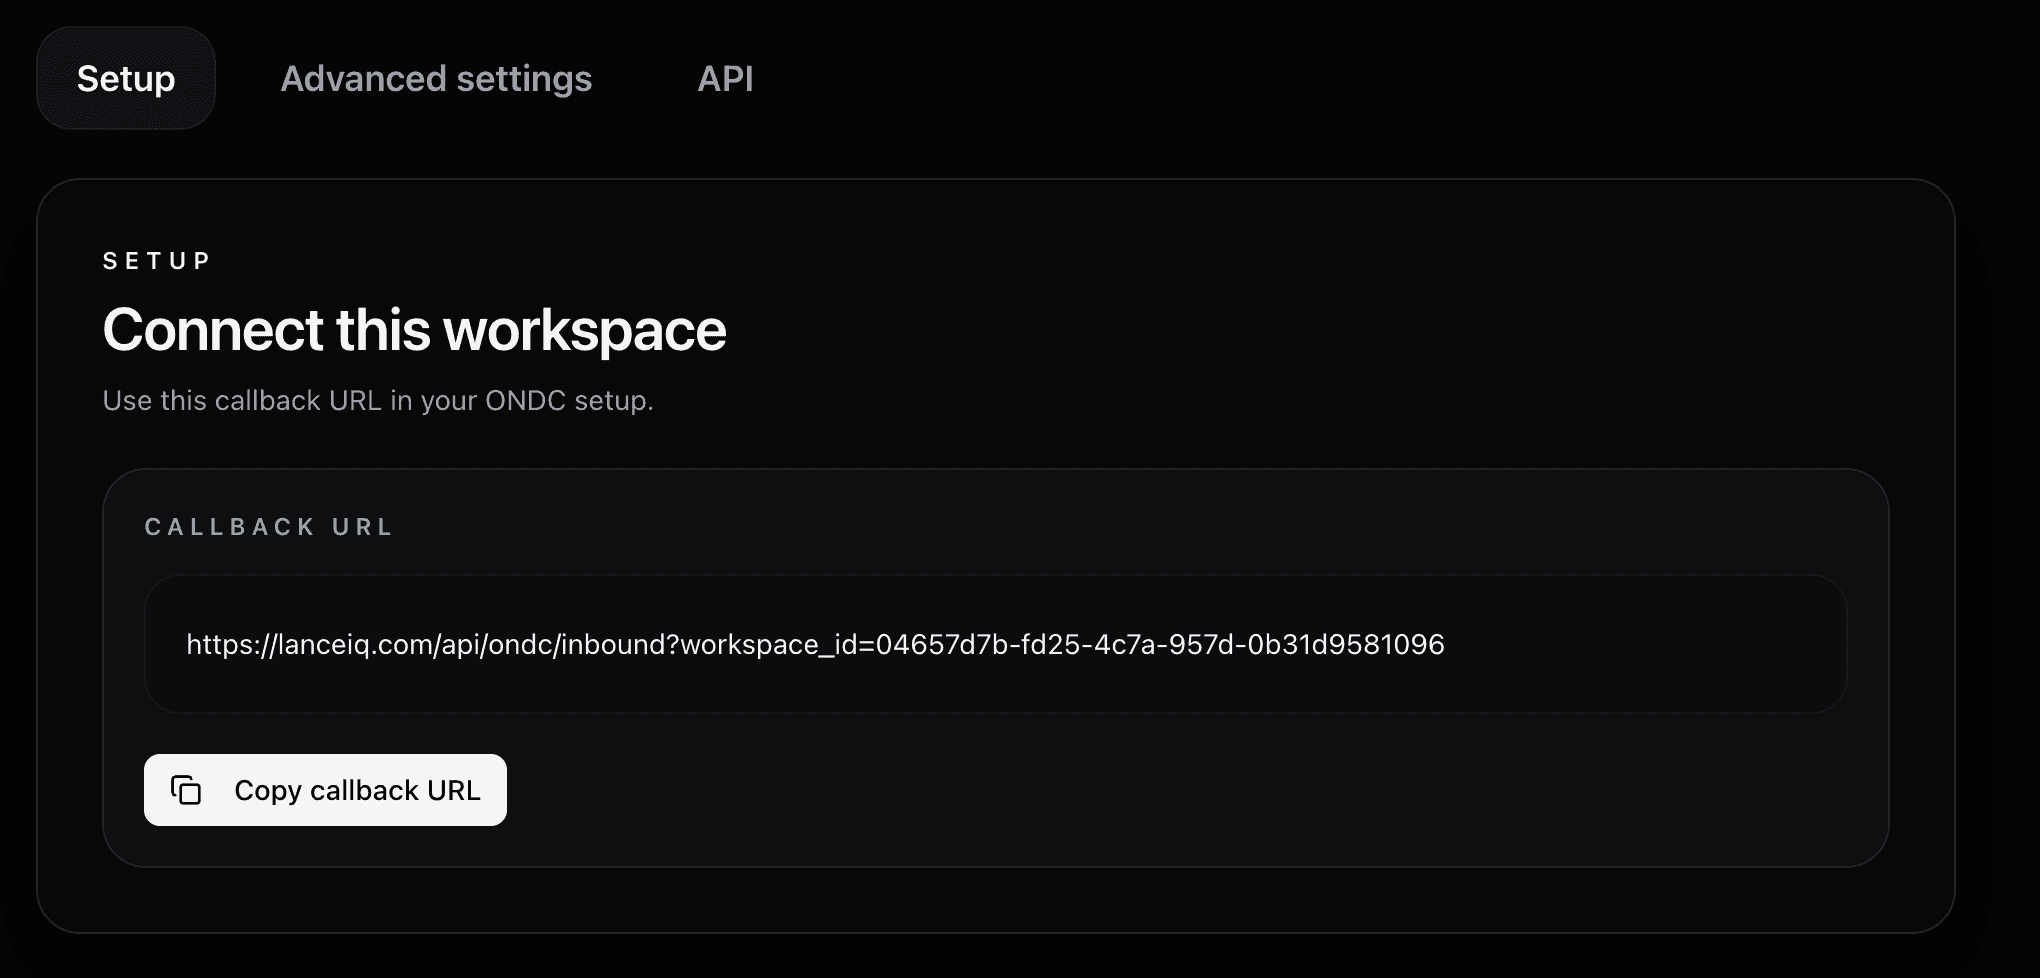
4. Copy the callback URL and use it in your ONDC setup
In the workspace tab select the workspace, go to Setup tab, copy the callback URL, and point your ONDC setup to that LanceIQ inbound endpoint.
Install
Install the SDK, then initialize the client.
Use the workspace ID and API key you copied during dashboard setup. Initialize LanceIQ from your backend with those values and the fixed API base URL.
npm install lanceiqNext Step
Initialize the client in your backend.
Use https://api.lanceiq.com, yourworkspace_id, and yourapi_key. Call LanceIQ only from your server, worker, or backend job.
import { createLance } from 'lanceiq';

const lance = createLance({
  baseUrl: 'https://api.lanceiq.com',
  workspaceId: 'your-workspace-id',
  apiKey: 'liq_...',
});
Search Sessions
Send one search request and read back one normalized session.
Use code when you want to trigger search directly from your backend. The same search activity can also be reviewed in the dashboard under the Searches tab, where LanceIQ shows aggregated results and recent search history.
// after initialization
const session = await lance.search({
  query: 'paracetamol',
  city: 'std:080',
  timeout: 5000,
});

console.log(session.status);
console.log(session.callbackCount);
console.log(session.results);
Complete Setup Example
Full end-to-end example.
import { createLance } from 'lanceiq';

// Copy these from the LanceIQ dashboard after you create a workspace
const workspaceId = 'your-workspace-id';
const apiKey = 'liq_...';

// The ONDC callback URL for this workspace should already be set
// in your ONDC configuration from the dashboard Setup tab
const lance = createLance({
  baseUrl: 'https://api.lanceiq.com',
  workspaceId,
  apiKey,
});

// Call LanceIQ only from your backend, worker, or server job
// timeout is the callback collection window for on_search responses
const session = await lance.search({
  query: 'paracetamol',
  city: 'std:080',
  timeout: 5000,
});

console.log(session.status);
console.log(session.callbackCount);
console.log(session.results);
Verification
Forward raw callback bodies and signed headers exactly as received.
Optional extra: use this when you wire your inbound callback endpoint. Your server forwards the real callback request to LanceIQ, and you can then confirm inbound activity and readiness checks in the dashboard under the Status tab.
import { createLance } from 'lanceiq';

const workspaceId = 'your-workspace-id';

const lance = createLance({
  baseUrl: 'https://api.lanceiq.com',
  workspaceId,
});

// Use the raw request body exactly as received by your server
const result = await lance.handleCallback({
  body: receivedRawBody,
  headers: {
    authorization: receivedHeaders.authorization ?? '',
    digest: receivedHeaders.digest ?? '',
    'content-type': 'application/json',
  },
});

console.log(result.ack.status);
Order Truth
Use order reads for business state and callback artifacts for protocol evidence.
Optional extra: use this when you need stored order state, timelines, or retained callback artifacts. The same information is also available in the dashboard under Orders and Order Check.
const orderId = 'ord_123';
const transactionId = 'tx_123';

const order = await lance.getOrder(orderId);
const timeline = await lance.getTimeline(transactionId);
const artifacts = await lance.getSearchSessionCallbacks(transactionId, {
  includePayload: true,
});

console.log(order.status);
console.log(timeline.length);
console.log(artifacts[0]?.storageMode);
console.log(artifacts[0]?.payload);
Evidence Packs
Generate one evidence pack from the same transaction and order IDs.
Optional extra: use this when you want to export evidence programmatically. You can also create the same packs in the dashboard under Audit, then open the Reports sub-tab.
const workspaceId = 'your-workspace-id';
const transactionId = 'tx_123';
const orderId = 'ord_123';

const pack = await lance.exportEvidence({
  workspaceId,
  presetId: 'order_dispute',
  transactionId,
  orderId,
  includeCallbackPayloads: true,
});

console.log(pack.status);
console.log(pack.pack_reference_id ?? pack.pack_id);